
Best Places to Put Security Cameras isn’t just a catchy phrase; it’s the key to making your home security system truly effective. When I first started setting mine up, I thought it would be simple: buy a few cameras, place them around the house, and that’s it. Easy, right? Not quite. I quickly learned that placement can make or break your setup. Too high, and you end up recording clouds. Too low, and you’ll have endless clips of shoes and squirrels. After testing, adjusting, and learning from a few funny mistakes, I realized that even budget-friendly cameras can perform impressively with the right positioning. In this guide, I’ll show you exactly where I place mine indoors and outdoors so you can capture what really matters and keep your home protected without turning it into a surveillance lab. If you’re still deciding on which camera fits your needs best, check out What is the Best Security Camera for Home? to make a smart choice before setting them up.
Before You Start: My Quick Setup Reminders
Before I grab a drill or start mounting cameras, I always take a few minutes to plan my setup because it saves me a lot of trouble later. First, I test the Wi-Fi signal at each potential location. There’s nothing worse than discovering your new camera can’t connect after it’s already mounted. If you’re unsure about how Wi-Fi affects your setup, check out Do Security Cameras Need Wi-Fi? to understand what really matters for connectivity. Next, I think about sunlight and glare. Outdoor cameras should avoid direct light or reflective surfaces that can wash out the video. I also angle them slightly downward to capture faces clearly and reduce sky or roof shots.
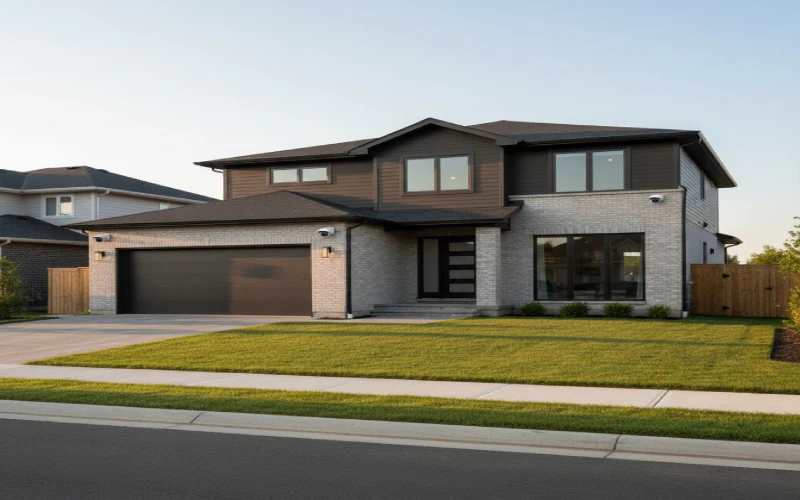
Outdoor Placement: Where I See the Most Action
When it comes to outdoor security, I’ve learned that smart placement is everything. A well-positioned camcorder can do more than just record, it can deter potential intruders before they even think about stepping onto your property.
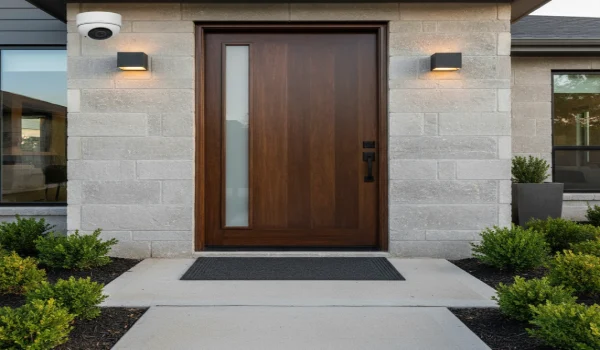
Front Door
Your front door is the first thing visitors see, so I always prioritize CCTV here. I mount it high enough to prevent tampering but low enough to capture faces clearly. A slight downward angle works wonders for visibility and glare reduction. I’ve even caught the occasional delivery person struggling with packages — it’s like having a helpful, silent witness. Make sure your surveillance unit isn’t blocked by trees, hanging plants, or seasonal decorations. Visibility is key; an obvious camcorder often keeps trouble away before it starts.
Driveway
I always set up a surveillance unit that covers both the driveway and walkways. Vehicles arriving, guests coming over, or suspicious movement that spot catches it all. For longer driveways, I recommend adding a second camcorder closer to the street. That way, you can see people approaching early, which gives you more reaction time.
Garage and Side Entrances
Garages and side doors are common targets for break-ins, so I never skip these areas. I mount cams high to avoid tampering while still capturing anyone trying to access these points. If your garage connects to your house, I also point one cams at the interior door. This setup ensures you’re covered if someone sneaks in unnoticed.
Front Gate or Fence Line
Placing a CCTV here gives you early alerts before anyone even reaches the property. I check Wi-Fi strength carefully or use wired options if needed. It’s also a good spot to monitor deliveries or visitors approaching the gate.
Backyard & Pool Area
I always place cams overlooking the backyard, back gate, and pool area. Besides security, they provide peace of mind for monitoring kids and pets. I’ve learned to angle them carefully: wide enough to cover entrances, but focused enough to capture movement clearly. And, yes, I sometimes review the footage just to see how my barbecue skills hold up and purely for professional research, of course.
Porch, Verandah, or Balcony
I install CCTV on porches or verandahs to cover easy-access areas like sliding doors or low railings. Corner-mounted cams often give the widest coverage while remaining discreet. Just make sure you don’t point directly into private areas or your neighbor’s property privacy matters, even outdoors. With these placements, I can cover all key outdoor areas effectively. Strategic positioning ensures my cams aren’t just gadgets rather they’re silent guardians keeping an eye on everything that matters.
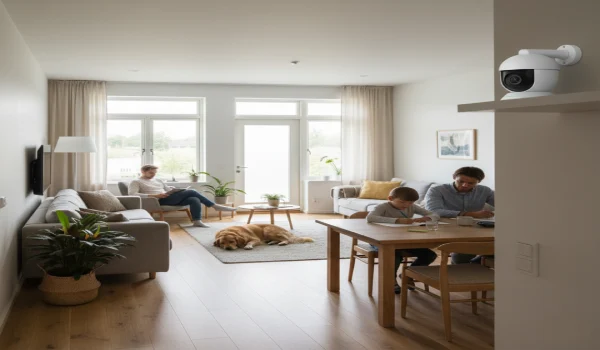
Indoor Placement: Watching Key Areas Without Being Creepy
Indoor CCTV are a bit trickier. You want coverage without making your home feel like a surveillance hub. From my experience, strategic indoor placement gives peace of mind without invading personal space.
Entryways and Hallways
I start with hallways connecting main rooms to doors. This way, I can see anyone entering the house while minimizing blind spots. I avoid pointing CCTV at windows, which can create glare or false motion alerts. One tip I learned: a slightly angled CCTV captures a better field of view than one perfectly straight-on.
Living Room
I place a camcorder here to monitor common areas and valuables. It’s also handy when I’m away, allowing me to check in on pets or see if a package arrived inside. A quick glance at the app keeps me connected without feeling intrusive.
Home Office
For anyone with a home office, I strongly recommend coverage here. Electronics, documents, and personal files need protection. I angle surveillance units to cover entry points rather than desks, which keeps sensitive information private while still monitoring for intrusions.
Kids’ Play Areas
Safety is my top concern in playrooms or dens. I position the camcorder to monitor toys, gates, or areas where kids might climb. I avoid recording beds or private spaces — it’s about safety, not spying. Plus, the occasional funny moment caught on camcorder reminds me why I invested in security in the first place.
Additional Tips for Indoor Cameras
I like to rotate angles slightly over time to eliminate blind spots. Regular testing and firmware updates are crucial indoors, just as outdoors. And, of course, keeping security cam out of reach prevents accidental bumps or tampering.
With indoor placement, less is often more. I focus on key areas, balance coverage with privacy, and make sure each camcorder serves a purpose — this keeps my home both secure and comfortable.
Common Mistakes I’ve Made (And Avoided Now)
Even after a few camera setups, I still see people make the same mistakes I did the first time. Here’s what I’ve learned:
- Mounting too high or too low: I once installed a camera so high that I only captured treetops. Another was so low it mostly recorded shoes. Both were useless for security. I now aim for about 8–10 feet for optimal coverage.
- Overlapping or missing blind spots: I initially thought more monitoring devices were better, but redundant angles just caused glare and confusion. I learned to plan coverage strategically.
- Ignoring night vision: One evening, I realized that a camera placed incorrectly produced completely black footage at night. I now test every camcorder in both day and night conditions.
- Pointing at windows: Glare can ruin footage. I’ve learned to angle surveillance units to avoid direct sunlight or reflective surfaces.
- Privacy oversights: I once accidentally caught my neighbor’s porch in a wide-angle shot. Lesson learned: always respect boundaries.
Mistakes happen, but planning and careful setup prevent most of them.
Privacy and Legal Etiquette
I take privacy seriously both for my household and my neighbors. Recording beyond your property line or public areas can cause legal trouble. Here’s what I always keep in mind:
- Focus on your property: Spy cam should cover doors, driveways, backyards, and common indoor areas without extending into neighboring homes.
- Indoors: I avoid bedrooms and bathrooms. Even recording common areas like living rooms or playrooms requires discretion.
- Audio recording: If your camera captures sound, check local laws and disable it where possible to avoid complaints.
- Transparency: I make sure family members know where camcorders are located. It builds trust and avoids misunderstandings.
Balancing security with privacy keeps my home safe. While maintaining good relationships with neighbors and it prevents awkward conversations later!
Maintenance Tips I Follow
Even the best-placed Surveillance unit needs a little attention to stay effective. Over time, dust, spider webs, or weather can affect performance, and I’ve learned that regular checks make a huge difference.
- Clean lenses regularly: I wipe down outdoor cams once a month to avoid blurry footage. Even a thin layer of dust can make a big difference.
- Check battery levels or wired connections: I set reminders on my phone to replace batteries or inspect cables so I never get caught with a dead camera.
- Review footage occasionally: Scanning past clips helps me notice blind spots or movement patterns I might have missed. Plus, sometimes I catch funny or unexpected moments that make me smile.
- Update firmware: I’ve learned the hard way that outdated surveillance units can become vulnerable. Keeping them updated ensures smooth operation and security.
- Adjust angles if needed: Seasonal changes or new landscaping can obstruct views, so I tweak angles as necessary.
With consistent maintenance, even a simple DIY system remains reliable and effective year-round.
My Personal Setup Tips
Over time, I’ve developed a few tricks that make installing and managing CCTV much easier:
- Start small: I recommend beginning with 3–4 key surveillance units: front door, driveway, back door, and one indoor spot. You can always expand later if needed.
- Label cameras in the app: I tag each feed with names like “Front Door” or “Playroom.” It’s a small step that saves a lot of confusion.
- Test motion alerts: Before relying on them, I trigger each camera and ensure alerts reach my phone correctly. False alerts can be annoying, but proper testing prevents them.
- Backup footage securely: I store important clips both in the cloud and locally. Once, I accidentally deleted a key clip, and trust me, I don’t want that to happen again.
- Move cameras if needed: I treat safety cams like living things if a blind spot appears or the yard changes, I reposition them. Flexibility keeps coverage optimal.
- Have fun with it: Occasionally, I review footage for quirky or funny moments. It’s a lighthearted perk of home security.
Following these tips makes setup smoother, monitoring easier, and ensures my cameras actually serve their purpose without creating extra hassle.
Choosing the Right Camera Type
When I set up my first home security system, I quickly realized that choosing the right camera type makes a huge difference. For most DIY setups, I recommend 100% wire-free, battery-operated Wi-Fi security-cams. They’re simple to install, allow for mobile viewing from anywhere, and spare you from dealing with messy cables or drilling through walls. I’ve found that these cameras offer flexibility. I can move them if I notice a blind spot or want to adjust coverage. Of course, not every home or setup is the same. A little planning upfront saves a lot of frustration later trust me, I’ve been there!
Conclusion: My Take on Smart Camera Placement
Placement beats price every time. Even the cheapest camera can be highly effective if positioned correctly, and I’ve seen this firsthand. It’s not about having dozens of CCTV everywhere, it’s about being strategic. I like to think of it this way: a well-placed camera is like a guard who never sleeps, quietly watching over your home while you go about your day. I’ve learned that focusing on key spots that front doors, back entrances, driveways, and main hallways often covers more than you might expect. It’s also important to maintain them: check angles, clean lenses, update firmware, and replace batteries as needed. With just a little attention, a simple setup becomes a reliable safety system.
Ultimately, the right placement, combined with occasional maintenance, gives peace of mind without making your home feel like a high-security fortress.
Frequently Asked Questions (FAQ)
Q1: How high should I mount my security cameras?
I usually place mine around 8–10 feet above the ground. It’s high enough to prevent tampering but low enough to capture clear facial features.
Q2: Can I put cameras inside without making my home feel like a surveillance zone?
Absolutely. I focus indoor camcorder on common areas like entryways, living rooms, playrooms, and home offices.
Q3: Should I point my camera toward the street?
No. I recommend focusing on your property. Capturing public areas can cross legal and privacy boundaries.
Q4: How many cameras do I actually need?
Start with 3–4 key camcorders: front door, driveway, back door, and one indoor location. You can always add more later if needed.
Q5: Can I monitor cameras remotely?
Most modern Wi-Fi camcorders allow live app-based monitoring.
Q6: Can I install cameras myself, or do I need a professional?
DIY installation is totally possible. I’ve set up multiple Camcorders myself. Just plan placement carefully and follow basic safety tips.
Q7: Can weather affect my outdoor cameras?
Yes, extreme heat, heavy rain, or snow can impact performance. I choose weather-resistant surveillance units and periodically check them, especially after storms.
Q8: What’s the best camera type for a DIY setup?
I recommend 100% wire-free, battery-operated Wi-Fi cameras — easy to install, mobile-accessible, and flexible for repositioning.