
How to connect security camera to phone? Stop thinking! Once reserved for businesses and high-end homes, they’re now as common as smart doorbells or wireless speakers. But setting them up, especially getting them connected to your phone, can feel like solving a puzzle with missing pieces. If you’re wondering whether Wi-Fi is required for the setup, check out Do security cameras need Wi-Fi?. The good news? It’s simpler than it sounds, and we’ll guide you through each stage without techy jargon or drama. You’ll learn which camera types pair easily, which settings matter, and how to avoid the common setup traps. By the end, your feed will be live on your phone and your peace of mind, too.
Check What Kind of Camera You Have
Before doing anything else, find out what type of security cam you’re dealing with. Different models connect differently and knowing this saves time.
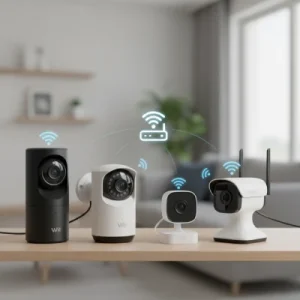
Wi-Fi Cameras: The most popular type among homeowners. These cams connect to your home’s wireless network, allowing real-time video streaming straight to your phone through a mobile software. They’re easy to set up, require no complex wiring, and often include motion alerts, two-way audio, and cloud storage for effortless monitoring from anywhere.
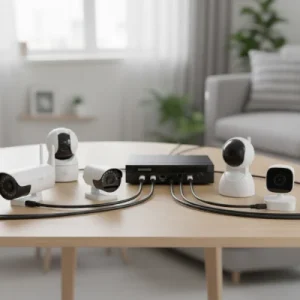
Wired Cameras: Require a physical connection to a DVR or NVR system for recording and viewing. Once installed, you can access the live feed through a compatible mobile software that syncs with your system, ensuring a stable connection, higher-quality video, and reliable performance without Wi-Fi interruptions.
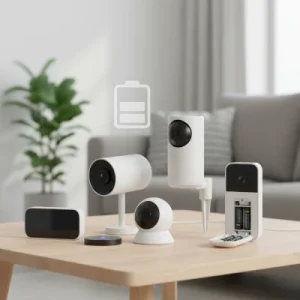
Battery-Powered Cameras: Operate completely wirelessly yet fix via Wi-Fi for remote access. Many models now feature rechargeable batteries or optional solar panels, offering extended runtime and easy placement without worrying about power outlets.

Smart Cameras: These integrate seamlessly with cloud-based apps or smart assistants like Alexa, Google Home, or Apple HomeKit. They allow voice commands, real-time notifications, and automated routines, like turning on lights when motion is detected creating a connected and intelligent home security experience.
💡 Quick tip: Check the camcorder box or user manual for a QR code or app name that’s often your shortcut to connection.
Step 1: Download the Camera’s Companion App
Most modern CCTV use a dedicated software for frame-up and control. Examples include:
- Ring → Ring App
- Arlo → Arlo Secure
- Reolink → Reolink App
- Blink → Blink Home Monitor
- Wyze → Wyze App
Go to the App Store (iOS) or Google Play (Android) and download the one that matches your camcorder brand. Make sure it’s the official version, not a third-party clone.
Once installed, create an account and verify your email. This will guide you through connecting your CCTV to Wi-Fi or a hub.
Step 2: Power Up the Camera
It sounds obvious, but you’d be surprised how often people forget this step, especially when the indicator lights are tiny or hidden.
- Plug in wired cameras using the provided adapter.
- Charge or insert batteries for wireless models.
- Wait for the indicator light (usually blinking blue or red) to show it’s ready to pair.
If your webcam doesn’t light up, check the power outlet or cable. A small flicker of life here saves hours of frustration later.
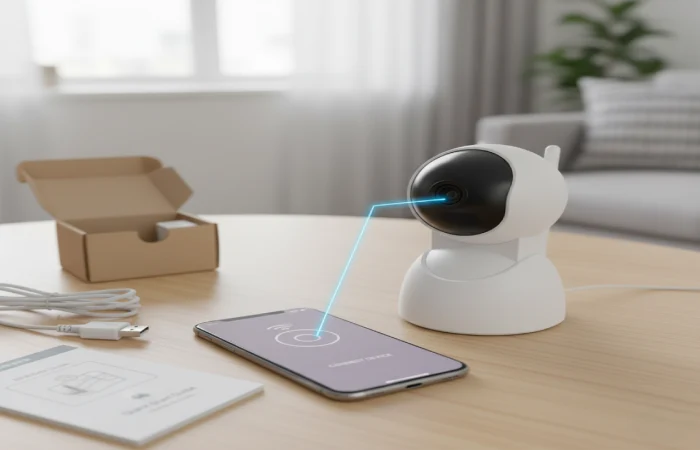
Step 3: Fix to Wi-Fi or Network
Open your camera’s software and select “Add Device” or “Fix camcorder.” You’ll typically see options like:
- Scan QR Code: Point your phone at the QR code on the camera.
- Wi-Fi Setup: Enter your network name and password.
- Bluetooth Setup: Some newer cameras pair through Bluetooth first before switching to WiFi.
Stick to a 2.4GHz Wi-Fi connection; many camcorders still don’t support 5GHz networks. Keep your phone close to the router during setup to ensure a stable signal.
📱 Pro tip: If your connection keeps failing, check your router’s firewall or temporarily disable any VPNs. They can interfere with pairing.
Step 4: Link Your Camera to the App
Once Wi-Fi is connected, your app will confirm the camera is online. From there, you can:
- Name the camera (e.g., “Front Door,” “Garage,” or “Backyard”).
- Set motion zones to monitor specific areas.
- Enable notifications for movement, sound, or person detection.
- Test live view to make sure the image is clear and responsive.
At this stage, your phone and cams are officially in sync. You can now view live footage, replay events, and tweak settings from anywhere with an internet connection.
Step 5: Test the Connection
Now comes the fun part, making sure everything works.
Walk past your camcorder and check if your phone receives an alert. Try viewing the footage remotely, switching between Wi-Fi and mobile data. If your software buffers endlessly, move the router closer or use a Wi-Fi extender. If the video lags more than a few seconds, it might not be your camera’s fault. It could be your network’s upload speed. Most camcorders need at least 2 Mbps per feed for smooth streaming. For those curious about whether camcorders can still work without the internet, check my other post: do security cameras need WiFi.
Step 6: Enable Remote Access
If you’re often away from home, enable remote access or “Cloud View.” This lets you monitor your camcorder from anywhere.
Most programs offer options such as:
- Cloud Storage: Record and save clips online (usually with a subscription).
- Local Storage: Save videos on SD cards or NVR drives.
- Two-Way Audio: Talk through your phone’s mic to visitors or delivery drivers.
Remember, cloud subscriptions aren’t mandatory. Local storage is often enough for personal use — just make sure to back up important footage.
Step 7: Sync with Smart Assistants
If you avail smart devices, integrate your camcorder for voice control and automation.
- Alexa: “Alexa, show me the front door camera.”
- Google Home: “Hey Google, stream backyard camera.”
- Apple HomeKit: Use the Home software to view feeds directly on iPhone or iPad.
This hands-free control makes daily monitoring easier, especially if you already apply voice commands for lights or thermostats.
Troubleshooting Common Issues
Even tech pros face hiccups. Here are quick fixes to common setup snags:
| Problem | Possible Fix |
| Camera not connecting | Ensure 2.4GHz Wi-Fi is used; restart router; reset camera. |
| Video not loading | Check upload speed; close background apps; lower video resolution. |
| App not recognizing device | Update firmware; reinstall software; scan QR code again. |
| Delayed notifications | Disable battery optimization for the software in phone settings. |
| Night vision blurry | Clean camera lens; check infrared lights; reposition slightly. |
Safety and Privacy Tips
- Change default passwords immediately after setup.
- Avoid public Wi-Fi when accessing your feed.
- Keep firmware updated to patch security vulnerabilities.
- Limit sharing access — only trusted family or staff should have permissions.
- Enable encryption if supported by your program.
These steps protect your data and ensure that only you (and those you authorize) can view your camera feeds.
Bonus: How to tie-up Multiple Cameras
If you’re building a full home setup, apply your app’s multi-device feature. Most support several camcorders under one account. You can view all feeds in one dashboard, name zones like “Driveway” or “Office,” and receive smart alerts that specify which CCTV triggered them. This is especially useful if you use different CCTV models from the same brand say, a Ring Floodlight outside and a Ring Stick Up Cam indoors.
Expert Recommendations
Based on field testing and user feedback, some camcorders are just easier to tie-up than others.
Here are a few that perform reliably with program integration:
- Ring Floodlight Cam Wired Pro: Easy to install, integrates perfectly with the Ring app.
- Reolink Argus 4 Pro: Wide field of view and 4K clarity.
- Arlo Essential Outdoor XL: Budget-friendly and battery-efficient.
You can read more details about them in Forbes’ roundup of the best home security camcorders for comparison and setup references.
Frequently Asked Questions
- Can I view my camera without the internet?
Yes — if it supports local storage (SD card or NVR). You can still watch recorded clips directly through the system when connected to the same network. - What app do I use to connect my camera?
Always apply the one recommended by your camera brand. Avoid third-party apps unless officially supported. - Why can’t my camera find Wi-Fi?
Your router might be on 5GHz mode. Switch to 2.4GHz or check distance from the router. - Can multiple phones connect to one camera?
Yes. Most apps let you share access with family members by inviting them through the system. - How do I reset a camera that won’t pair?
Hold down the reset button for 10–15 seconds, then start the setup process again.
Final Thoughts
Connecting a security camera to your phone doesn’t need to feel like a coding project. Once you understand your camcorder type, use the right system, and ensure your Wi-Fi is stable, the rest is smooth sailing. Within minutes, you’ll have live feeds, instant alerts, and peace of mind all from your pocket. And if your camera still refuses to cooperate, don’t worry. Even tech editors occasionally end up staring at blinking lights, wondering who’s really in control.